Fiery Foods & BBQ Central Recommendations
Chile Pepper Bedding Plants…over 500 varieties from Cross Country Nurseries, shipping April to early June. Fresh pods ship Sept. and early Oct. Go here.
Chile Pepper Seeds…from all over the world from the Chile Pepper Institute. Go here.
Photos by Harald Zoschke
After choosing the varieties of peppers to plant, along with accompanying plants, the gardener must next plan the garden. There are many considerations affecting garden design, including site, soil type, rainfall, method of irrigation, mature height of various plants, structural support for plants like pole beans and tomatoes, and access to the garden for weeding and harvesting. Following are descriptions of the most commonly used pepper garden designs, along with their benefits and drawbacks.
Ridges and Furrows
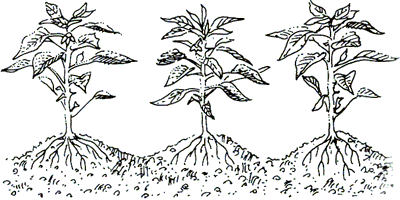
Perhaps the most familiar of all garden designs, this type has alternating ridges (or hills) and furrows (or trenches). The plants grow along the ridges and are irrigated from the furrows. This method works well for commercial growers who must use farm equipment to plow, till, weed, and apply fertilizers and insecticides. The furrows are very handy for quick irrigating, too. Ridges and furrows are also useful in regions with heavy rainfall because the moisture tends to drain off the ridges and into the furrows.
For the home gardener, however, some drawbacks exist to the ridges and furrows design. It wastes space and plants cannot be packed efficiently into smaller gardens. In desert regions, the ridges tend to draw salts to their peaks and injure the plants. Also, unless proper mulch is used, the ridges tend to dry out quickly.
Flat Beds
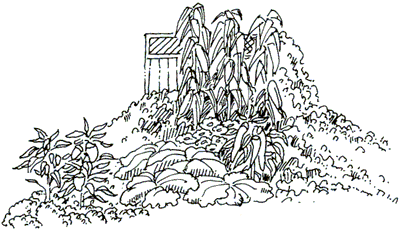
This garden design is perhaps the simplest to construct. After soil preparation, the site is surrounded by a berm (raised soil) that will hold water during flood irrigating or after rainfall. The interior part of the flat bed is carefully leveled to avoid high spots, which will dry out too quickly. The flat beds should only be about four feet wide to allow easy access for weeding and harvesting.
The advantages of flat beds are they tend to hold water better than ridges and furrows, and the beds use space more efficiently. Yields of peppers tend to be larger because more plants can fit into the available space. A disadvantage is the lack of access; without furrows, there are no walkways to the plants. Another disadvantage is the necessity for level beds precludes their use on sloping sites.
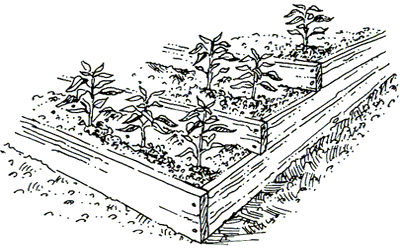
Raised Beds
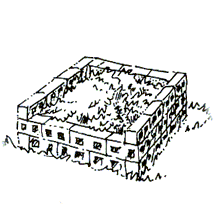
Used primarily for good drainage, this above-ground system uses bricks, blocks, logs, or wood planks to contain the garden above the usual soil level. A well-drained soil mixture is filled into a huge container. This design is often used in damp climates or in places where the soil contains a lot of clay. There are a couple of drawbacks to this system: it can dry out quickly and the material retaining the beds must be maintained.
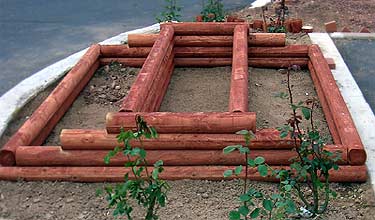
Frame for a Dual-Level Raised Bed
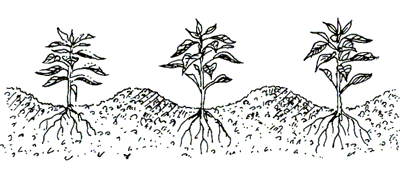
Sunken Beds
This design, used by the ancient Egyptians, is the opposite of ridges and furrows. The plants are placed in the furrows, where they are protected from high winds until they are well established. The disadvantage to this system is that the plants are placed where the most water accumulates, so the garden must be well-drained.
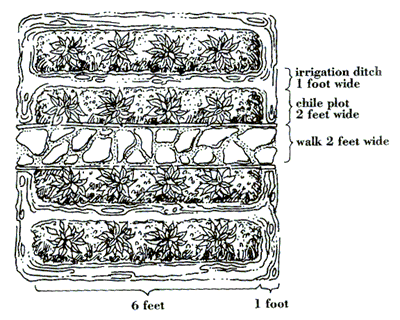
Modified Irrigated Beds
After years of growing peppers in small plots in the Southwest, we have developed a system that works well because it allows us to grow peppers with most of the other vegetables and herbs in the garden. It also maximizes space in a narrow garden, provides excellent access, and allows quick and efficient irrigation. Essentially, it combines elements of both ridges and furrows and flat beds, and can be used in gardens with a slight slope.
A brick, stone, or concrete walkway down the center of the garden allows easy access. In the plot on each side of the walkway, a shallow center furrow is cut to provide irrigation. From these center furrows, side furrows are cut so that the plants have their own slightly raised beds that are not as tall as conventional ridges. During irrigation, these small beds will be usually be surrounded by water on three sides. Irrigation is easy because the hose is placed at one end of each bed, and the furrows quickly fill. The grower can control the spread of water in sloping gardens with small dams made from soil or sections of two-by-fours.
This design will also work in wetter regions if the soil is well-drained. In extremly wet regions, a flat bed without furrows is better. One drawback is that the walkway takes up a lot of space; however, it is relatively weed-free and can be utilized during irrigation.
After choosing the design of the pepper garden, the gardener should prepare a scale drawing and choose locations for the peppers and accompanying plants. The next steps involve improving the garden site.
Composting
The key to a great pepper garden is the addition of compost, which improves workability, water holding capability, drainage, and fertility of the soil. Many gardeners have no choice about composting because many landfills across the country do not accept organic yard refuse–such as grass clippings. Thus, composting is a necessity.
Composting is the process whereby organic material decomposes into humus, with the help of microorganisms, insects, earthworms, and water. Also necessary is oxygen, for anaerobic decomposition is a slow process that causes foul odors.
Several books have been written on composting, which seems to indicate that the process is enormously complicated. As gardening writer Jack Ruttle points out: “People have been making compost for a thousand years, time enough for a considerable mythology to have arisen around the practice. Some of the methods for assuring a ‘perfect’ compost sound like pure witchcraft. Certainly, the idea of perfect compost, which has become the holy grail to some gardeners, discourages many others.”
In reality, composting is quite simple, and a compost pile should always be a part of pepper gardening. Following are the procedures for easy composting.
Site Selection
The following criteria are important for a good compost pile: ample available water, an inconspicuous location convenient to the garden, and at least six hours of sunlight a day.
Containers
A compost pile can be just that–a pile of organic material. However, such piles are sloppy and difficult to control, so most gardeners prefer to use containers or bins for composting. The simplest containers are holes in the ground, or trenches, but the compost in them is difficult to turn and to remove.
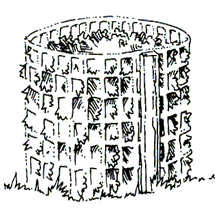
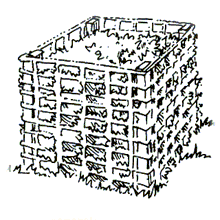
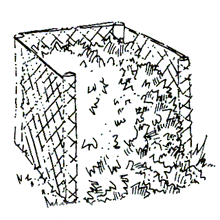
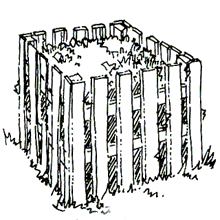
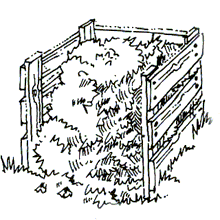
Containers can be constructed from a wide variety of materials, but in all cases, they should be enclosed on three sides, leaving the front and top open. Some suggested containers include wire screening, wooden bins, cinder blocks or bricks without mortar, and snowfencing.
Some sources suggest that piles can be as large as ten feet long and five feet high, but such large piles are difficult to maintain. The ideal pile in a bin or container is three feet high by three feet wide. Anything larger is difficult to turn and tends to compact too much, preventing oxygen from reaching all parts of the pile. If you have too much organic material, start another pile.
Proper Materials
The following materials make good compost: coffee grounds, corn stalks and leaves, egg shells, garden plants killed by frost, grass clippings, kitchen scraps (fruits and vegetables), leaves, manure from herbivores, pine needles, sawdust, shredded newspaper, straw, and weeds (unseeded).
The following materials are unacceptable for compost: bones, branches from trees and shrubs, colored newsprint, diseased garden plants, fats and grease, grass clippings treated with herbicides, kitty litter, magazine pages, manure from carnivores like pets, meat, plastics, synthetic products, and wood ashes.
It is important that dissimilar materials be added in layers. For example, the pile should not consist solely of grass clippings, which tend to pack together and prevent air circulation. Rather, the clippings should be interspersed with layers of other materials.
Most sources on composting insist that garden soil must be added to the pile to introduce microoganisms. But Dr. Clarence Goluke, an engineer who researched composting at the University of California at Berkeley, discovered that bacteria and fungal spores occur naturally in the air and on just about any organic material, so adding soil to the pile to “innoculate” it is superfluous. It does not hurt the pile to add soil, but soil does not speed up composting at all and will make the pile bulkier.
Dr. Gouleke also discovered that the process of shredding all materials into tiny particles is overrated. Yes, shredding makes the pile smaller, but it is not necessary for large, soft materials such as weed stems or heads of cabbage. Shredding should only be used for large, hard materials such as tree branches, which can be used as mulch in the flower garden.
Many sources state that the compost pile needs manure in order to add sufficient nitrogen and make the pile heat up. Actually, green matter such as grass clippings will do a good job when applied in a ratio of one part green material to three parts brown (dried) material.
The question of whether or not compost provides enough natural fertilizer is much debated. Some sources insist that compost is actually a soil dressing, not a fertilizer, and that a pint of high-nitrogen fertilizer such as a 12-12-12 (N-P-K) or 10-6-4 should be included each time a layer is added to the pile. They state that the fertilizer not only adds nitrogen, which speeds decomposition, but also adds valuable nutrients missing from the compost.
Organic gardeners disagree and avoid using chemical fertilizers, preferring to add aged manure to the compost pile or directly in the garden. While organic gardeners concede the point that most compost is low in soluble nitrogen, potassium, and phosphorous, Jack Ruttle observes: “I have grown many fine vegetable gardens with no other fertilizer than an inch or two of pure compost applied once a year, and I have known plenty of other gardeners who do the same.” Since peppers do not need high amounts of nitrogen, compost and manure generally provide enough nutrition for the plants.
The Composting Process
Microorganisms decompose the plant material (which is mostly carbon), producing carbon dioxide and heat. As the pile rots, the temperature of the pile may reach 160 degrees F. This heat tends to kill weed seeds and disease organisms, but probably will not work in cooler parts of the pile. Thus, the pile should be turned so that all parts heat up. Another reason for turning the compost is to speed up the decomposition process. Each turning cuts the rotting time approximately in half, but unturned piles will be ready in about a year, and the compost will be just as good. The determination of how often to turn the pile depends upon how quickly it is needed in the garden.
Keep the pile covered and protected from rainwater, for the water will leach out potassium and nitrogen. Water the pile with a hose until there is run-off. It should be moist and springy to the touch–like a damp sponge. Then cover the pile with plastic sheeting.
Troubleshooting
Here are common composting problems and their solutions:
- The pile has a strong odor. The pile is too wet or has insufficient oxygen, so add dry materials or turn the pile.
- The pile is damp but will produce heat. There is insufficient nitrogen, so add grass clippings or other green matter.
- The pile is too acidic. Add lime.
- The pile is dry and not composting. Add water.
- The pile is too hot and starts burning. Turn the pile more often.
- The pile has an ammonia smell. There is too much nitrogen, so add sawdust, dry leaves, or other high-carbon materials, and turn the pile.
Application
Some gardeners sift the compost from the bins through a one-half inch mesh screen and return larger particles to the pile for further decomposition. Compost should be applied at the rate of one to four bushels per 100 square feet of garden and then rototilled into the soil. During the growing season a layer two or three inches thick can be used as a mulch if desired.


