

 0
0
 0
0
by Dave DeWitt
|
Part 6: Chili Cooking and Serving Techniques
|
Recipes: Mauldin Chili Tyson Ranch Chili Bubba’s Chili Ed’s Buffalo Snort Red Chili Black Bean Chili |
Once you have all the ingredients assembled, it is a simple matter to cook your chili. Wrong. Nothing about chili is simple, as you probably realize by now.
Chili Liquidity and Cooking
Chili needs a liquid as its final cooking medium, and whatever you choose will either be water or water-based. Some of the more interesting liquids used by chili cooks are broths such as beef or chicken bouillon–or in some extreme cases, the broth the beans were cooked in. Beer is commonly used in recipes, but we suspect this practice has a lot to do with the drinking habits of the cooks. The alcohol doesn’t do as much for the chili as for the cook, however, because the heat causes it to evaporate. Recommended brands are Lone Star and Coors, and chili cooks generally stay away from dark beers. Wine is occasionally used, and we suppose this indicates a more gourmet aspect to the chili. We have heard of tequila or scotch being added to chili, but we don’t recommend them. Coffee also turns up in chili recipes from time to time, but again, that could reflect on the habits of the cook or the time of the day he or she started cooking the chili.
|
|
Liquid and Solids: Jailhouse Chili
|
Most chili recipes call for simmering chili, usually uncovered, for two or three hours. But Dr. Crum advised a higher heat: “Inasmuch as the connective tissue of meat is comprised of three proteins–elastin, reticulin, and collagen–it is possible to make meat more tender by maintaining the cooking temperature near the boiling point of water. This has the effect of transforming the collagen in gelatin, which is a gummy solution that has the effect of making tougher meats more tender, and this is especially important if one decides to use a lower quality of meat for chili.”
Tight Chili
The consistency (meaning texture) of chili is extremely important. When there is a great separation between the solids in chili and the liquids, the consistency of the chili is generally inferior. Slowly simmering (or even boiling) the chili can reduce the amount of liquid, but often not enough. Chili should cling evenly to the wooden stirring spoon when it is removed from the pot; some say that the spoon should stand straight up when placed in properly thickened chili. When a small spoonful of chili is placed on a saucer, no liquid should run out of it. This is called “tight” chili.
|
|
Here Is the Preferred Test of Tight Chili
|
Often, a thickener is needed to bind the solids and liquids together into a homogenous mass. “The addition of thickeners blends liquid and fat into a rich, clinging gravy,” noted John Thorne. “The two favorites are flour and masa harina, the corn flour used to make tortillas. The advantage of the latter is that it adds a hint of sweet corn flavor to the chili and can also be sprinkled in pinch by pinch during the cooking without fear of lumps. Since finer cut meats absorb much more liquid, some cooks grind about a third of their beef to use as a thickener. Others use cracker meal or–such as the U.S. Army–ground cooked beans.” Perhaps the most common thickener is white flour, which is pre-mixed with an equal amount of water to avoid lumps, and is then added to the chili. An approximate amount is one-fourth cup flour to each two quarts of chili. The pot is removed from the heat, the flour-water mixture is added, and then the pot is returned to the heat and is brought to a slow boil for about two minutes, or until the chili thickens to the desired consistency. If the chili is too thin, add more of the flour-water mixture; if it is too thick, add more liquid.
Cooks should remember that although there are quite a few thickeners, some are more efficient than others. For example, arrowroot is twice as efficient as flour, so use less of it. Also, some thickeners, like corn meal or ground nuts, will change both the flavor and texture of the chili, making it “grainy.” The list of possible thickeners includes: arrowroot, bread crumbs, corn flour (masa harina), corn meal, corn starch, flour, ground almonds (or other nuts), ground crackers, ground beans, ground pumpkin seeds, instant grits, oatmeal, potato flour or starch, potato flakes, rice flour, and tapioca.
Joe Cooper noted that thickeners should be the finishing touch to chili. “Thickened chili must be stirred almost constantly to avoid scorching,” he wrote, “or at least sticking to the bottom of the pot.”
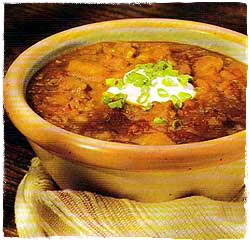
Prize-Winning Techniques
“It can be observed that you only have a random chance of ever winning a prize,” cautioned systems analyst R. F. Carlisle, “until you can learn to be consistent and understand what you do, and what you expect to find when you taste your chili.” It was Carlisle’s theory that cooks should not try to cook their best chili, but rather the winning chili. To accomplish this task, first they must determine which chilis win over and over again and then attempt to duplicate them. Once duplicated, Carlisle advised, the chilis must be cooked in the same manner every time. Andy Housholder, the author of a guide to making winning chili, emphasizes: “You must please the judges, not yourself. You must cook what the judges will like best.”
|
|
1982 CASI Terlingua Champion, Photo by Jo Ann Horton
|

Some chili cooks have shared their chili cooking techniques in print. John Thorne wrote that he sears his chili meat over mesquite wood to give it a “haunting hint of smoke.” Floyd Cogan suggested not adding herbs and spices directly to the chili, but rather mixing them together first with a cup of boiling water. “This technique,” he wrote, “blends and fixes your flavors more effectively than adding your spices and herbs one at a time to your chili pot.” He also advised that the herbs and spices should be added late in the cooking so as not to overcook them.
Linda West Eckhardt, author of The Only Texas Cookbook, advised: “Remember that chili just doesn’t taste right if you don’t cook it in an iron pot. I suppose just a little of the iron leaches out in the chili and provides that little extra push it needs.” However, not only are iron pots difficult to find these days, it is difficult to keep them properly seasoned when acid ingredients such as tomatoes and vinegar are added to chili. Some cooks complain that an iron pot gives chili an unappealing metallic taste. A more reasonable cooking vessel is a heavy, metal Dutch oven which has been enameled.
In addition to the suggestion of using an iron pot, most chili cooks insist that a wooden spoon is the only kitchen utensil that should be used to stir chili. Floyd Cogan pontificated: “A wooden spoon impresses your guests and adds to the important mystique that all good chili makers use. Besides, if you leave the spoon in the chili pot, it does not get hot like a metal one does.” Call us conservative, but we fail to see how a simple wooden spoon will impress anyone. Perhaps Floyd was writing about an wooden spoon elaborately carved with chile pepper motifs by the Indians of Tiburon Island in Mexico.
Other techniques for winning chili include some “fixes” for chilis. To brighten the color of the chili from brown to red, for example, many cooks use paprika because it is extremely high in carotene, which gives it the bright red color without adding extra heat. For chili that is too salty, try adding some brown sugar and vinegar that have been mixed together. Add some vinegar or lime juice to chili that is too flat, and, conversely, add honey to chili that is too sour. Not enough flavor? Some cooks add monosodium glutamate (MSG) because it really does intensify the flavors of savory foods. However, this additive is extremely unpopular in some circles because it is reputed to cause headaches and dizziness–symptoms which most chili cooks prefer to get from alcoholic beverages rather than from food additives.
|
|
Holiday Magazine’s Famous Chili Illustration, 1967
|

Andy Housholder, author of How to Cook Championship Chili and Win!, has page after page of hints in his how-to guide designed for chili cookoff enthusiasts. He wrote that one of the biggest mistakes chili cooks make is “I like it, so I’ll put it in.” He advised: “When in doubt, leave it out.” Another error is using spices that he says are “foreign to Championship Chili. No cinnamon, no curry, no parsley, or mint–they are not chili cousins.” Andy also eschewed oregano, calling it a “spaghetti spice.” Here are a few of Andy’s championship hints at-a-glance: freeze your competition spices; double grind your spices; marinate the meat in your spice mixture (this is not allowed at some cookoffs); season the judging cup with your chili to remove the styrofoam aroma; add brown sugar and uniodized salt to taste 45 minutes prior to judging, but add just a tad more salt because judges’ tongues tire from all the tasting and they tend to like “a slightly oversalted chili.”
From the “less is more” chili contingent, there is an old saw that goes: “To improve your chili, remove an ingredient.” And here is some final advice on competition chilis from R. F. Carlisle: “If you improve your winning ratio, it will provide only a small extra reward over and above the rewards of participating in a fun-loving afternoon with chili cooks.”
Serving Chili
The first step in serving any chili you prepare is to skim the fat off it. Although fat adds flavor to chili, too much of it tends to give your chili a reputation for being greasy. Since fat rises to the top of the chili, at least it’s easy to find. A large shallow spoon can be used by keeping it parallel to the top of the pot and gently inserting it until just the fat runs into it. Another method is to wrap ice cubes in cheesecloth and skim them across the top of the chili–but this method is awkward and messy. By far, the best method is to place the chili in the refrigerator or freezer until the fat congeals on top and turns white. Then it can be easily removed with a spoon.
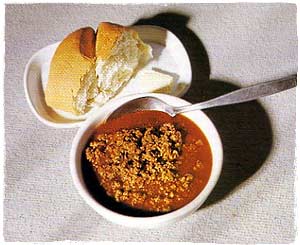
Select attractive bowls in which to serve the chili because presentation is part of the entire process of making and serving chili. “Use showmanship and style when cooking your chili,” Cogan advised. Make sure you pre-warm the bowls in the oven so the chili will retain most of its heat during serving.
|
|
Attractive Bowl of Red
|
Many sources suggest that chili tastes best if it’s not served right away. “You know, chili is better the second day,” noted Linda West Eckhardt, author of The Only Texas Cookbook. “And the third day it’s perfect.” The problem with leftovers, according to John McGee, author of On Food and Cooking, is that “fats are the principal source of off-flavors in cooked meats”–even more reason to skim the fat before re-heating chili. However, McGee noted that leftovers containing poultry and pork, which have a greater proportion of unsaturated fats, are more likely to have off-flavors than beef and lamb.
Our chili chemist, Dr. Crum, believes that capsaicin, the heat ingredient in chile peppers, which is an antioxidant, minimizes fat oxidation in the cooking process, thus improving the flavor of chili. “Release of phospholipids and unsaturated fat from meat muscles,” he wrote, “may actually be slowed during the heating process, leading to better flavor and a more palatable ‘left-over’ flavor. This is in fact suspected to be the case, because most chili lovers claim that it improves after one or two days, whereas beef fat normally deteriorates on standing.”
Garnishes and Variations
We have already seen in Part 2 that Cincinnati-style chili is commonly served with pasta, cheese, onions, and beans, but these additions are just a few of the garnishes that can be served with the bowl o’ red. Other toppings include chopped olives, bell peppers, hard boiled eggs, cilantro, parsley, grated jalapeño (or other) cheese, crushed chile pods, croutons, tortilla chips, popcorn, avocado slices, a fried egg, or sour cream.
Side dishes to accompany chili can include steamed rice (strictly family-fare), corn bread, bread or bread sticks, tortillas, biscuits or rolls, garlic bread, salads, pickles, fruits, and just about anything your imagination can think of.
John Thorne, a chili purist, considers soda crackers to be the only acceptable accompaniment. “A true chilihead,” he wrote “considers soda crackers (or at least tortillas) as essential an ingredient with a bowl of red as the meat itself. The crackers, by the way, should be large enough to give diners the pleasure of crumbling them into their bowls–and that means no stupid little oyster crackers.”
Recipes
“My wife’s a great chili maker,” bragged Bill Mauldin, the famous political cartoonist. “Of course, she makes enough for a battalion in the infantry.” His soldiering background and pride in his mate’s culinary skills combine as Mauldin reviews the family’s favorite recipe.
|
|
Bill Mauldin’s Classic Cartoon from WW II
|

-
2 to 3 pounds coarsely ground beef
-
1 tablespoon New Mexican red chile powder
-
2 tablespoons olive oil
-
2 large onions, chopped
-
4 cloves garlic, minced
-
3 bell peppers, coarsely chopped (preferably 1 red, 1 green, and 1 yellow)
-
2 8-ounce cans of whole tomatoes, chopped
-
1 8-ounce can of tomato paste
-
4 cups water
-
1 cup black coffee
-
1 tablespoon sugar
-
2 tablespoons vinegar
-
1 teaspoon oregano
-
1 teaspoon cumin
-
2 tablespoons salsa
-
2 tablespoons chile powder (1 tablespoon each of cook’s choice)
-
2 8-ounce cans kidney beans
In a large skillet, brown the beef in small batches, sprinkling in the red chile powder while it cooks. Drain the fat off the browned beef and set aside. In a large soup pot, add the olive oil and saute the onions, garlic, and bell peppers until they are soft.
Add the chopped tomatoes and tomato paste to the sauteed vegetables along with the four cups of water. Stir in the coffee, sugar, vinegar, oregano, cumin, salsa, chile powder and browned beef mixture. Bring the chili to a boil, reduce the heat, and simmer for one hour. Add the beans and cook for another 15 minutes.
Yield: 8 to 10 servings
Heat Scale: Medium
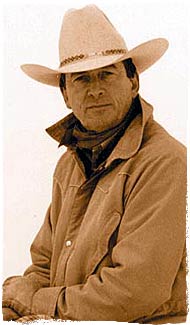
Between albums, Canadian cowboy musician Ian Tyson always makes time to enjoy his wife’s chili. Chock full of venison, this chili is truely unique. His song, “Early Morning Rain,” made famous by his first group, Ian and Sylvia, is one of my favorite tunes of all time. Here is his highly unusual chili.
|
|
Cowboy Musician and Chili Cook Ian Tyson
|
-
1 12-ounce can of beef consomme
-
1½ cups red wine
-
4 to 6 ounces tomato sauce
-
2 bay leaves
-
4 cinnamon sticks
-
Pinch ground coriander
-
1 tablespoon dried oregano
-
2 to 3 tablespoons vegetable oil
-
4 cloves garlic, chopped
-
4 to 5 venison steaks cut into bite-sized cubes
-
1 large onion, chopped
-
1 green bell pepper, stem and seeds removed, chopped
-
1 red bell pepper, stem and seeds removed, chopped
-
1 4-ounce can New Mexican green chile, chopped
-
2 to 3 jalapeños, stems and seeds removed, chopped
-
6 to 8 large dried apricots, chopped
-
Cooked fettucine noodles
-
Feta Cheese, sour cream, and hot sauce for garnish
Combine the consomme, wine, tomato sauce, bay leaves, cinnamon, coriander, and oregano in a large pot.
Heat the oil in a pan until hot. Add the garlic and the meat and brown. Remove the garlic and the meat and put into the cooking pot. Add the onion, green and red bell peppers and the New Mexican green chile to the oil and saute for 1 to 2 minutes. Add to the pot. Add the jalapeños and apricots to the mixture and simmer for 2 hours. Turn off the heat and let stand for 1 hour. Reheat before serving.
Serve the chili on top of the fettucine noodles, topped with the feta cheese, sour cream, and hot sauce.
Yield: 6 servings
Heat Scale: Medium
No project on chili con carne would be complete with out a recipe from a guy from Texas named Bubba. This wonderful recipe requires 3 hours cooking time and a bit of Texas magic!
-
2 pounds very lean beef, coarse chili grind, or cubed in ½-inch pieces
-
1 8-ounce can beef broth
-
4 ounces tomato sauce
-
2 tablespoons hot chile powder (California Fancy preferred)
-
1/4 teaspoon oregano
-
½ teaspoon cayenne
-
2 teaspoons onion powder
-
1 teaspoon white pepper
-
½ cup tomato sauce
-
1 tablespoon New Mexico Light chili powder
-
½ teaspoon MSG (optional)
-
1 teaspoon paprika
-
1 teaspoon garlic powder
-
2 teaspoons cumin
-
1 teaspoon onion powder
-
1 teaspoon beef bouillon granules
-
1 package Goya Sazon (available in Latin markets)
-
2 tablespoons commercial chili powder of your choice
-
½ teaspoon black pepper
-
1 teaspoon garlic powder
-
1/8 teaspoon jalapeño powder
-
1 teaspoon chicken bouillon granules
-
½ cup tomato sauce
-
1 teaspoon cumin
-
½ teaspoon garlic powder
-
1 tablespoon commercial chili powder of your choice
-
½ teaspoon onion powder
-
1/8 teaspoon cayenne
-
Salt and cayenne to taste
Brown the meat in a large pan on medium heat. Add the beef broth and tomato sauce, stir lightly and cover with the lid. When the mixture has started to reach a light boil, add the California Fancy or other hot chili powder, oregano, cayenne pepper, onion powder, white pepper, tomato sauce, New Mexico Light, MSG (if desired), paprika, and garlic powder and cook for 2 hours, or until the meat is tender. If the meat is tender before 2 hours, turn off the burner and let the pot rest.
One hour before serving time, reheat the chili on low heat, and add the cumin, onion powder, beef bouillon granules, Goya Sazon, chili powder of your choice, black pepper, garlic powder, jalapeño powder, chicken bouillon granules, and tomato sauce. Stir the chili well and add water if the mixture is too thick.
About 15 minutes before serving, add the cumin, garlic powder, chili powder of choice, onion powder and cayenne. Just before serving, add salt and cayenne pepper to taste.
Yield: 4 to 6 servings
Heat Scale: Hot
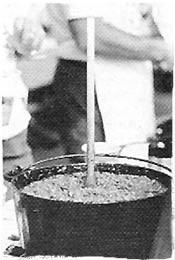
Ed Dorfman, winner of many awards and trophies for his barbecue and chili, says that the ambience of his restaurant (Texas Chili and Rib Company, Phoenix, Arizona) is that of a small Texas bar. Basically a carry-out, his “small joint” seats about thirty people who dig into his brisket, ribs, chicken wings, and several different kinds of chili. About his love for chiles, he calls himself a “capsaicin-holic” who uses chile in everything he cooks–note the eight chile-related ingredients of this recipe.
|
|
Ed Dorfman’s Buffalo Snort Illustration
|

-
½ pound bacon with fat
-
2 pounds Spanish onions, chopped fine
-
5 tablespoons New Mexican red chile powder
-
2 tablespoons cayenne powder
-
4 jalapeño chiles, stems and seeds removed, chopped
-
½ cup canned New Mexican green chile, chopped
-
1 dried red New Mexican chile pod, stem removed
-
1 pound Italian hot sausage
-
Dash Tabasco hot sauce
-
1 teaspoon Hungarian hot paprika
-
3 pounds crushed Italian tomatoes
-
1 tablespoon Mexican oregano
-
10 ounces T-bone steak, chopped fine
-
5 pounds coarsely ground chuck
-
1½ cups water
-
1 bottle Lone Star Beer
-
2 teaspoons salt
-
1½ cups chopped bell pepper
-
1 tablespoon garlic in oil, chopped
-
2 tablespoons Worcestershire sauce
-
1 tablespoon raw sugar
-
5 tablespoons cumin
-
1 pound fresh armadillo meat (optional)
Fry the bacon in a soup kettle, add the onion, and saut until soft. Add the remaining ingredients and bring to a boil. Reduce heat and simmer for about two hours, stirring frequently.
Yield: More than 10 servings
Heat Scale: Hot
The Galley del Mar in Ridgeland, Mississippi, is an “upscale resort-area restaurant for fine, casual dining,” according to owners Wayne Craft and Larry McCandless. Its specialty is spicy seafood dishes prepared by a collaboration of their cooking staff supervised by Lloyd Kent, but occasionally they drift off into the area of chili con carne. Note: This recipe requires advance preparation.
-
1 pound black beans, cleaned
-
1 tablespoon red chile powder
-
½ teaspoon cayenne
-
1 tablespoon cumin
-
2 teaspoons paprika
-
1 tablespoon oregano
-
1 bay leaf
-
1 tablespoon olive oil
-
1 onion, chopped
-
4 cloves garlic, minced
-
1 bell pepper, seeded and chopped
-
2 cups canned chopped Rotel tomatoes with liquid
-
2 jalapeños, stems and seeds removed, chopped (or more for heat)
-
1 dried red New Mexican chile pod, stem and seeds removed
-
1 tablespoon chopped fresh cilantro
-
1 pound tenderloin tips, cubed
-
2 teaspoons salt
-
1½ teaspoons black pepper
-
1 ham hock
-
3 cups canned peeled tomatoes with liquid
-
½ cup Burgundy wine
-
Cilantro sprigs for garnish
Soak the beans overnight in water. Drain and refill the pot until the water just covers the beans, and bring to a boil. Reduce heat and simmer 1 hour.
Combine the red chile powder, cayenne, cumin, paprika, oregano, and bay leaf in a heavy skillet and toast until the spices are brittle, but do not burn.
Heat the olive oil and saute the onion, garlic, and bell pepper until soft. Add the spices and tomatoes and saute 15 minutes. Add the remaining ingredients and enough water to make a loose consistency and simmer, covered, for 2 hours. Adjust the water if necessary. Uncover and simmer, stirring occasionally, until thickened. Remove the ham hock and chile pod, add the cooked black beans, and serve in bowls garnished with sprigs of cilantro.
Yield: 8 to 10 servings
Heat Scale: Medium
00