
 0
0
 0
0
By Dave DeWitt
Hundreds of articles and at least one book– The Pepper Garden— have been written on the home and commercial cultivation of the Capsicums, so there’s far too much information to go into great detail in this section. This is designed as a basic gardening guide for beginners using organic techniques.
The Strategy
The combination of long growing times of the increasingly popular exotic chile varieties and the medium to short growing seasons in many parts of North America forces many gardeners to examine their strategy. In order to get the maximum number of peppers from these potentially prolific varieties, the plants need enough time to produce and ripen up the pods. That often means extending the natural growing season at the front end, the back end, or both.
-
Undecided which ones to grow this year? Check our Pepper Profiles.
Starting Seeds
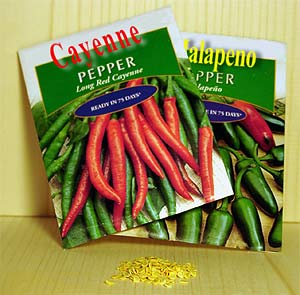 Commercial seed packages
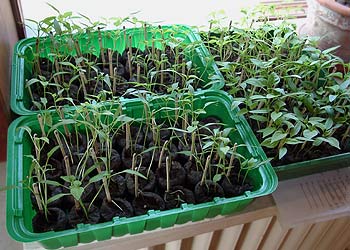
To stretch the beginning of the pepper growing season, start the plants indoors around January or February (January if the garden is in the South; February in the North). Plant the pepper seeds in “recycled” plastic six-packs (from plants bought at nurseries) filled with a loose seed-starting mix. Plant far more seeds than the actual number of plants needed for the garden, thinning out the weakest plants later, and perhaps even planting a few of the extra seedlings in pots that can be moved back indoors come fall.
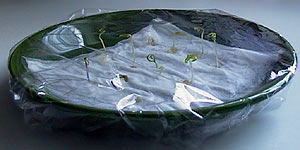 Germination test on damp paper tissue
After sowing the seeds in the pre-moistened seed-starting mix, set the six-packs (or seed-starting flat or pots or whatever) on a source of bottom heat (such as a heating cable, a seed-starting mat, or the top of the refrigerator) to boost germination. Cover the setup loosely with plastic to retain moisture, spritz the surface lightly with tepid water every day if it seems dry, and then, after the seeds have sprouted, remove the plastic and move the containers someplace where the seedlings will receive plenty of bright light–either the sill of a super-bright, clean window; very close to a four tube fluorescent fixture; or under some high-intensity grow lights.
Well-lit, well heated: a place on the window sill above the heater
The pepper plants will grow more foliage and flowers (and therefore more fruit) if the seedlings are prevented from becoming rootbound. So either start them in large containers or transplant them into increasingly larger pots, starting when the seedlings hit the four-leaf stage. Then, when the seedlings are finally transplanted outside, their roots will be vigorous and spread out–not cramped–and the plants will get off to a running start.
Pests
A couple of pests do go after pepper seedlings–aphids especially like to attack young plants indoors. Fight these little pests with fire by knocking the aphids off the seedlings with a spray mixture of soapy water and chile powder. To make it, add about one-half to one teaspoon of the hottest, most finely ground chile powder to a quart of ready-made insecticidal soap solution (mixed according to the label) or to a quart of water containing 2 drops of dishwashing soap, well mixed. As always, test the spray on one or two plants before spraying the rest of them.
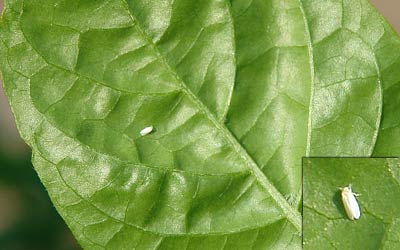
Whiteflies – just one of many potential pepper pests (Photo: Allen M. Boatman)
The other “pest” most known for its tendency to damage pepper seedlings (and thus reducing potential yields) is a cat, who will graze on your pepper seedlings if he/she has the chance, so keep the six-packs and seedling tray out of reach.
-
For detailed information, see our four-part article Chile Pests and Problems
Transplanting
Soon the pampered peppers will be moved from the protected sanctuary of the home or greenhouse into the brutal spring environment of high winds, low temperatures and bright light. To toughen the seedlings’ stems so that they can withstand those outdoor winds, place them in front of a fan for 3 to 7 days before they are scheduled to go outside. Keep the fan on day and night at a setting that’s just high enough to create a moderate breeze. Don’ t blow the seedlings over–just create some good air circulation.
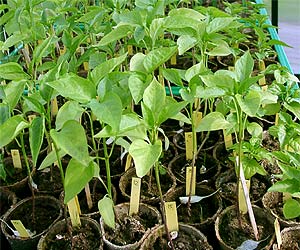 Ready for transplanting
Then sometime around the last frost date, begin to further prepare the seedlings for their move outdoors by “hardening them off”: Place the seedlings outside for increasing periods of time each day–even overnight if a nice warm spell hits-over a 1 to 2 week period.
Preparing the Plot
While hardening off those seedlings, prepare their future garden site. They’ll grow best in raised beds in most regions, and in sunken beds in dry climates. The pepper garden should ideally be located somewhere that peppers haven’t grown for several years to help prevent disease problems. Admittedly, a strict crop rotation is hard to do in a small garden, but a pepper planting can at least follow a spring crop of peas. Try not to grow peppers in the same spot two years in a row.
Dig some compost or aged manure into the pepper bed before planting. This will be all the nutrition the peppers will need for the growing season to come. Use aged (not fresh) manure to ensure against nitrogen overdose, which can cause low yields. There have been cases of six foot tall jalapeño plants with plenty of foliage but no pods on them, because the grower fed them too much nitrogen too fast.
If growing peppers in the North (or any place where the ground is chilly), warm up the soil by covering it with black plastic for a few days before the planting. Don’t pull up this “mulch” later on–leave it right where it is and plant the peppers into holes cut into the plastic–this will keep the soil warm, decrease the water needs and prevent weeds.
 A well-developed root system
When planting, use only the healthiest and most vigorous seedlings. Leggy, stunted or aphid-damaged plants will not recover sufficiently to fulfill their yield potential. Space the seedlings about 6 to 12 inches apart. Many garden guidelines suggest a 12-inch spacing between pepper plants, but smaller-podded varieties can easily be squeezed in to a 6-inch space.
But don’t plant all of the seedlings in the ground. Save some of the plants for growing in containers outside, so the pots can be moved indoors to a brightly lit area when the weather turns cool in fall.
The newly transplanted peppers will need as much warmth as they can get. Protect the peppers from low temperatures by covering the plants with a floating row cover, such as Reemay. Some gardeners surround their seedlings with water-filled innertubes or Wallo’Waters (flexible plastic tubes arranged in a circle that are filled with water, sold at garden centers, nurseries and by mail-order). The water absorbs heat from the sun during the day, and then holds onto that heat after temperatures start to cool. Overnight, the water releases that heat, keeping the soil and air around the seedlings nice and warm. Another warm-water technique is to fill several gallon-sized plastic milk jugs with water and bury them halfway in the ground next to each seedling (be careful not to disturb the plant’s roots when digging).
For growing chiles in containers, you might be interested in these articles:
-
Forget the Soil! Grow Hydroponic Chiles – Hydroponics means cultivation
of plants in nutrient solution rather than in soil. The technique offers quite a
few advantages, also for the chile gardener. -
Growing Peppers in Containers – There also some advantages to growing peppers
in containers. Dave DeWitt and Paul W. Bosland offer helpful hints.
The Growing Season
When summer arrives, weeds may try to seize control of the pepper patch. Prevent them at all costs. Weeds not only look ugly, they can harbor pests like leafhoppers, which spread curly top virus to pepper plants (which happened with devastating effect throughout New Mexico in 1995). So keep those hoppers homeless by making the garden weed free.
For gardeners who live in warm zones, the summer sun can be more of a hindrance than a help to getting high yields. Intense sunlight can actually cook peppers (a problem called sunscald) and decrease the yield of usable fruits. If gardening in a high-altitude region with intense sunlight, shade the peppers by covering the plants with shade netting (available at garden centers or by mail-order). Rig up a makeshift frame over the peppers and drape the shade cloth over this frame so it remains easy to tend the peppers under their “tent.” Varieties such as habaneros and rocotos are especially prone to sunscald–and both perform and yield better under the netting than they do in open, unshaded plots.
During the hottest days of July and August, pepper plants can lose a lot of water through their leaves. When this occurs, the leaves wilt and the flowers (and sometimes fruit) drop right off the plants. Reduce this water loss by boosting the humidity around the plants with a thick layer of mulch such as dried grass clippings (placed over top of the plastic mulch, if using it).
 Plants with high yields and/or heavy pods should get some support
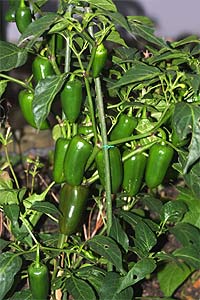
Once the plants start producing their peppers, there’s another little trick to use to maximize the yields–at least with the pepper varieties that are eaten green, such as jalapeños, serranos and the New Mexican varieties. Increase the total yield of these varieties by continually picking the peppers when they reach their largest “mature green” size, and not waiting for them to fully ripen on the plant. When a pepper plant reaches its “fruit load” (the maximum weight of peppers the plant can support), it will stop flowering and fruiting even though there may be a month or more left in the growing season. Removing the mature green fruits signal the plant to continue flowering and setting fruit throughout the remainder of the season–and the result is more pods per plant.
Harvest Time
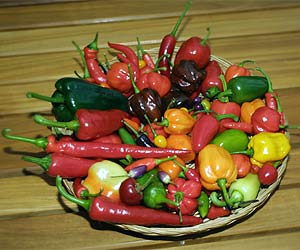 Chile Harvest
Harvested chiles can be used and preserved in many ways. Please refer to these articles for more information:
-
From Pods to Powder: Drying Chiles – For many gardeners chile harvest time means “too many chiles”. Here’s what you need to know about drying the pods, making powders and beautiful ristras. Plus eight recipes using dried chiles.
-
Canning Chiles and Sauces – More advice and recipes how to preserve your chile surplus.
-
Juicin’ Chiles Some interesting experiments and recipes with – that’s right! -chile juice.
-
Handling and Processing Fresh Chiles Before thinking about preservation methods like drying or pickling, enjoy as many pods as possible fresh, for unmatched flavor and texture. Here’s how.
-
How to Make Hot Sauces – Turn your chiles into sauce! Here’s a selection on commercial manufacturing, along with recipes for attempting to duplicate some of the classic hot sauces that are most popular today.
-
Fried Peppers – In many countries, frying peppers is a common culinary practice. Dave explored this cooking method.
-
And of course our RecipeBase gives you countless ideas what to cook with your precious peppers. You can even search the database by chile variety.
Often, the first frost of the year does not signal the end of the growing season. The early frost is followed by an “Indian Summer” that brings enough warm weather to keep peppers growing for another 3 or 4 weeks. But to make use of this extended season, it is necessary to cover the plants. There are many good crop protectors–cotton bed sheets, clear or black plastic, nylon netting, plastic row covers, even large cardboard boxes placed over individual plants. The material should be thick and dense enough to retain ground heat, but not so thick that it will break off branches if it gets weighted down by rain or snow.
Place the covers in position as early in the day as possible–say between 4 and 6 p.m. on the evening of the frost–so that there’s still some heat to retain (it gets cool fast at night in the fall). And be sure to remove such covers as soon as it’s warm enough the following day.
If the temperature is going to drop below 28 degrees F, though, the covering efforts will probably not be enough to protect the plants from the cold. But there are other plants, those peppers that have been growing in pots. Move them indoors before the first frost, and the plants will over-winter nicely. If there are not any peppers in pots, dig up a few of the healthiest favorites in the garden (don’t dig up a struggler hoping it’ll recover inside–it won’t), pot them in a soil that drains well, then move them inside. These plants may drop most of their leaves over the winter, but most will survive and come back strong–especially if they are pruned in the spring, cutting off any branches that look dead and brown, rather than green. The plants will sprout new growth vigorously after such a pruning, even if you cut them back severely.
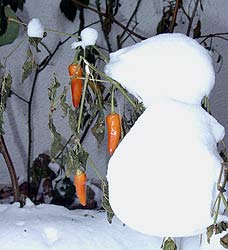 Too late…
Gardeners can even make this indoor overwintering and spring pruning a perennial event, because peppers are perennials when grown in frost-free conditions. Wintered-over pepper plants need regular watering, but unless you are actively growing them by providing artificial light, there is no need to fertilize them until they resume growing in the spring.
-
Our complete Pepper Gardening Index of related articles
Based on an article in The Pepper Encyclopedia, by Dave DeWitt. 1998, William & Morrow Co. – Web article photos by Harald Zoschke
00